TTEP.CN > 故障 >
Word2013怎么插入艺术字效果 Word2013插入艺术字效果的方法
Word2013怎么插入艺术字效果 Word2013插入艺术字效果的方法 我们的生活中越来越离不开电脑,但在使用电脑的过程中总会遇到各种各样的问题。TTEP致力于给电脑小白朋友们介绍一些简单常用问题的解决方法,这次给大家介绍的是Word2013插入艺术字效果的方法。
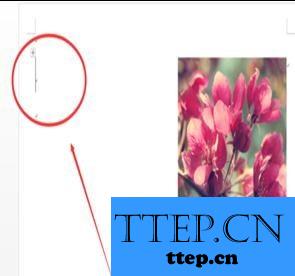
步骤一:首先打开你需要插入艺术字的文档,选择要插入的位置
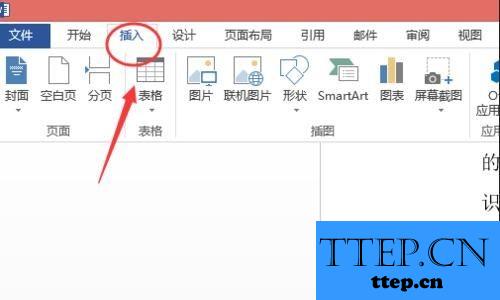
步骤二:在主菜单中找到“插入”选项
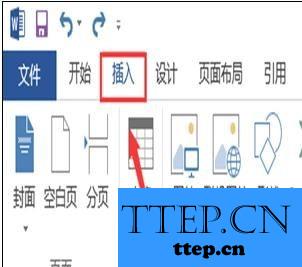
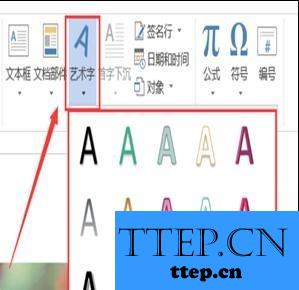
步骤三:在选项中单击“艺术字”,选择你需要的艺术字样式
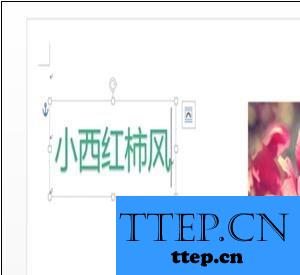
步骤四:删除文本框中填充的文字

步骤五:输入需要设置艺术字格式的文字
插入艺术字效果方法二:
步骤一:打开电脑后,打开word或者PowerPoint软件。找到最上面一栏的‘插入’选项,点击插入之后,再走到‘艺术字’这个选项。
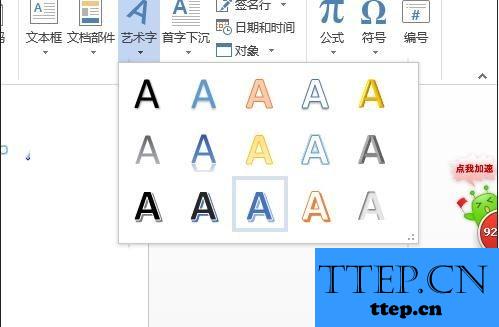
步骤二:点击‘艺术字’的那个三角形,会出现很多种艺术字的类型样式。根据自己的喜好,选择一种样式,然后在规定的文本框里输入自己要编辑的文字。
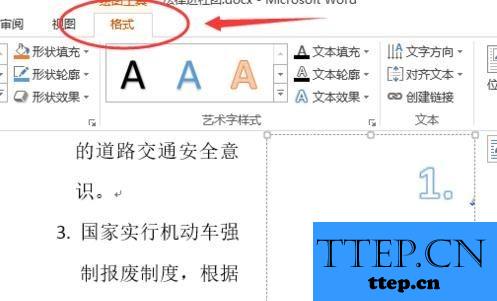
步骤三:编辑好了之后,再将光标停在艺术字的文本框里面。接着在窗口的最上面那一菜单栏里面会出现一个菜单选项‘绘图工具--格式’,单击它。
步骤四:之后再‘格式’选项的下面右方找到‘文本效果’,点击文本效果后面的三角形,会出现很多种样式。
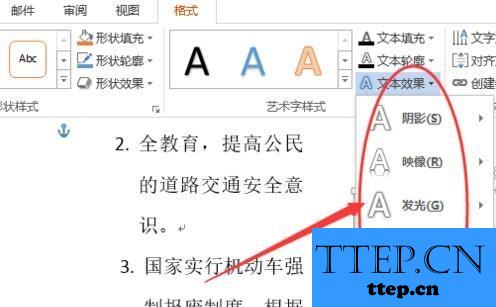
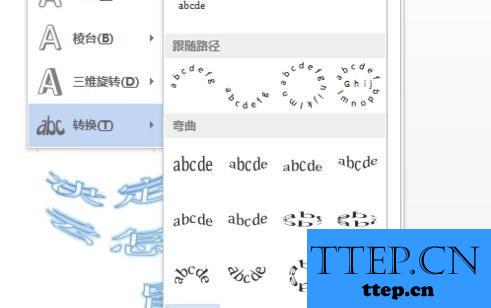
步骤五:几种选项的效果都是叠加的,用鼠标指着‘转换’选项,之后再用鼠标指着转换后面的选项时,会有预览效果,如果满意就单击该效果。
以上就是为您介绍的Word2013插入艺术字效果的方法,有兴趣的朋友可以试试以上方法,这些方法简单容易上手,希望对解决大家的问题有一定的帮助。
步骤一:首先打开你需要插入艺术字的文档,选择要插入的位置

步骤二:在主菜单中找到“插入”选项

步骤三:在选项中单击“艺术字”,选择你需要的艺术字样式

步骤四:删除文本框中填充的文字

步骤五:输入需要设置艺术字格式的文字

插入艺术字效果方法二:
步骤一:打开电脑后,打开word或者PowerPoint软件。找到最上面一栏的‘插入’选项,点击插入之后,再走到‘艺术字’这个选项。

步骤二:点击‘艺术字’的那个三角形,会出现很多种艺术字的类型样式。根据自己的喜好,选择一种样式,然后在规定的文本框里输入自己要编辑的文字。

步骤三:编辑好了之后,再将光标停在艺术字的文本框里面。接着在窗口的最上面那一菜单栏里面会出现一个菜单选项‘绘图工具--格式’,单击它。

步骤四:之后再‘格式’选项的下面右方找到‘文本效果’,点击文本效果后面的三角形,会出现很多种样式。

步骤五:几种选项的效果都是叠加的,用鼠标指着‘转换’选项,之后再用鼠标指着转换后面的选项时,会有预览效果,如果满意就单击该效果。

以上就是为您介绍的Word2013插入艺术字效果的方法,有兴趣的朋友可以试试以上方法,这些方法简单容易上手,希望对解决大家的问题有一定的帮助。
- 上一篇:word2013怎么分段设置页码 word2013分段设置页码的图文教程
- 下一篇:没有了
- 最近发表
- 赞助商链接