主页 > 经验 >
WIN7电脑如何设置虚拟网卡方法步骤 windows7添加虚拟网卡的图文
WIN7电脑如何设置虚拟网卡方法步骤 windows7添加虚拟网卡的图文教程。我们在使用电脑的时候,总是会遇到很多的电脑难题。当我们在遇到了需要设置电脑的虚拟网卡的时候,应该怎么办呢?一起来看看吧。
1、开始-->设置-->控制面板-->添加硬件:

第二步:选择是,硬件已连接好。

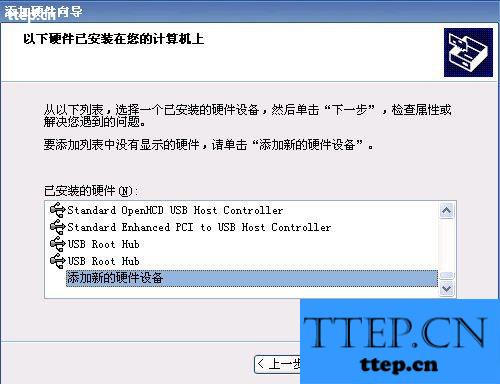
第三步:下拉到最后,选择添加新的硬件设备。
第四步:选择"安装我手动从列表选择的硬件(高级)M"。

第五步:下拉到后面,选择"网络适配器"。

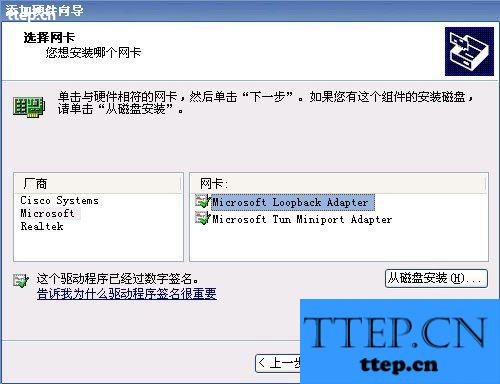
第六步:从左边选择"Microsoft",右边选择"Microsoft Loopback Adapter"。
第七步:开始安装了。

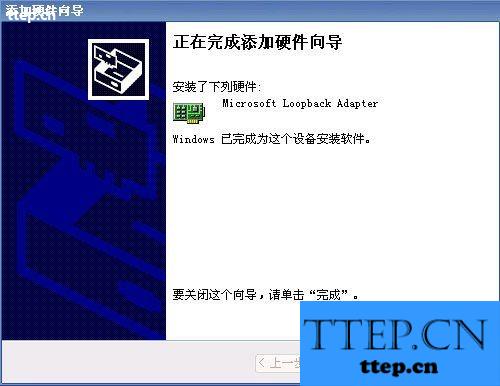
安装完成后会出现一个Microsoft Loopback Adapter的网卡,可以像操作正常的物理网卡一样操作它。

对于我们在遇到了需要设置电脑的虚拟网卡的时候,我们就可以利用到上面给你们介绍的解决方法进行处理,希望能够对你们有所帮助。
1、开始-->设置-->控制面板-->添加硬件:

第二步:选择是,硬件已连接好。

第三步:下拉到最后,选择添加新的硬件设备。

第四步:选择"安装我手动从列表选择的硬件(高级)M"。

第五步:下拉到后面,选择"网络适配器"。

第六步:从左边选择"Microsoft",右边选择"Microsoft Loopback Adapter"。

第七步:开始安装了。


安装完成后会出现一个Microsoft Loopback Adapter的网卡,可以像操作正常的物理网卡一样操作它。

对于我们在遇到了需要设置电脑的虚拟网卡的时候,我们就可以利用到上面给你们介绍的解决方法进行处理,希望能够对你们有所帮助。
- 上一篇:华为Mate8触摸振动关闭教程
- 下一篇:美术宝删除聊天消息教程
- 最近发表
- 赞助商链接