主页 > 经验 >
CentOS增加网卡教程 CentOS增加网卡的方法
CentOS增加网卡教程 CentOS增加网卡的方法 1. 新增网卡后确认
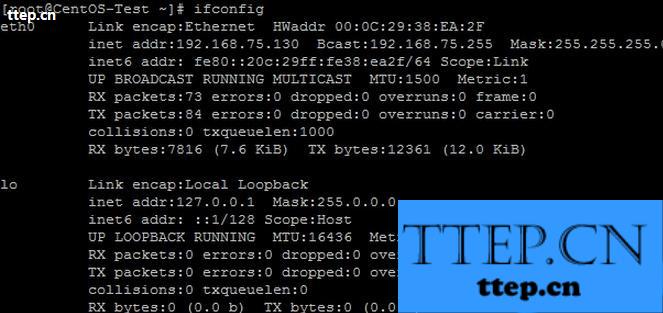
a. ifconfig
新增网卡后,不会自动启动,所以也不会有IP
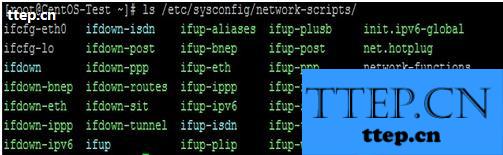
b. ls /etc/sysconfig/network-scripts
很正常的,没有设定档
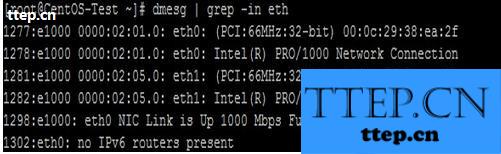
c. dmesg | grep -in eth
有网卡eth1,但没Up
2. 设定
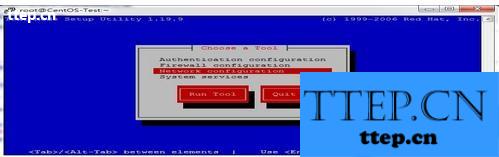
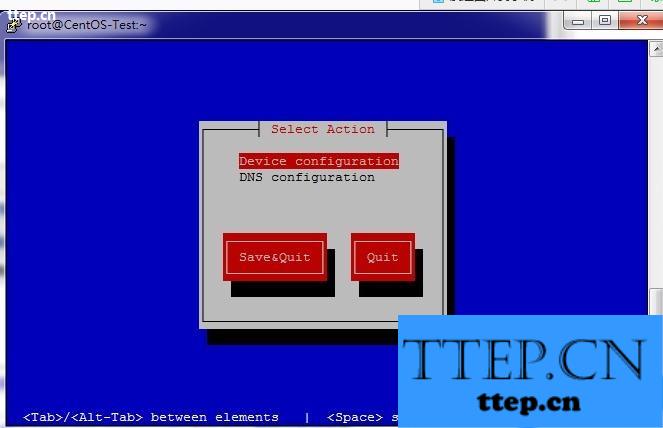
a. Network Configuration
输入setup,选择『Network Configuration』
b. Device Configuration
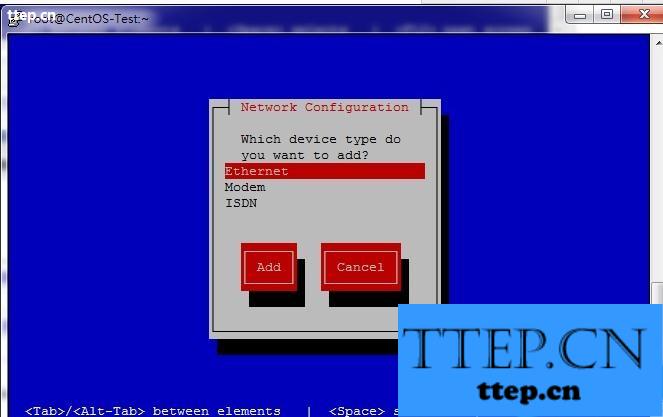
c. New Device
看到这里,应该就知道了吧,我也很想笑~~~

d. Ethernet
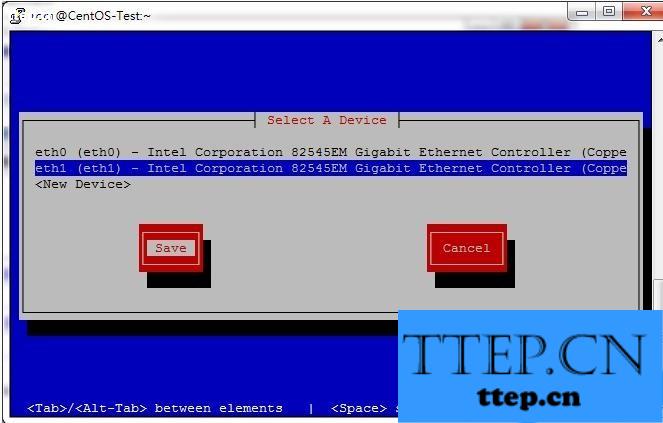
e. Name & Device
因为我是用在内网的,所以输入名称及装置名称后,使用DHCP分配IP。
3. 完成确认
a. 确认装置已新增并储存离开
b. dmesg | grep -in eth1
网卡已Up

c. ifup eth1
d. ls /etc/sysconfig/network-scripts

完成,就是这么简单的完成了,一直往难的地方想,结果用简单的方式弄出来~~
a. ifconfig
新增网卡后,不会自动启动,所以也不会有IP

b. ls /etc/sysconfig/network-scripts
很正常的,没有设定档

c. dmesg | grep -in eth
有网卡eth1,但没Up

2. 设定
a. Network Configuration
输入setup,选择『Network Configuration』

b. Device Configuration

c. New Device
看到这里,应该就知道了吧,我也很想笑~~~

d. Ethernet

e. Name & Device
因为我是用在内网的,所以输入名称及装置名称后,使用DHCP分配IP。
3. 完成确认
a. 确认装置已新增并储存离开

b. dmesg | grep -in eth1
网卡已Up

c. ifup eth1
d. ls /etc/sysconfig/network-scripts

完成,就是这么简单的完成了,一直往难的地方想,结果用简单的方式弄出来~~
- 上一篇:怎么设置电脑默认程序(图文教程)
- 下一篇:教你认识电脑键盘上各个键功能
- 最近发表
- 赞助商链接