主页 > 经验 >
电脑声卡怎么调试?声卡调试的详细过程
电脑声卡怎么调试?电脑的声音不对,总是出现破音,想调试一下看俺哪里出了问题,顺便截图出来给大家参考,万一遇到这个问题也能自己维修,下面分享图文教程,需要的朋友可以参考下
声卡也叫音频卡,是多媒体技术中最基本的组成部分,是实现声波/数字信号相互转换的一种硬件。声卡的基本功能是把来自话筒、磁带、光盘的原始声音信号加以转换,输出到耳机、扬声器、扩音机、录音机等声响设备,或通过音乐设备数字接口使乐器发出美妙的声音。在不同系统下,调试的方式也不同,以Vista系统为例:
1、打开声音调节板,在右下角的小喇叭上点右键,选择“录音设备”。

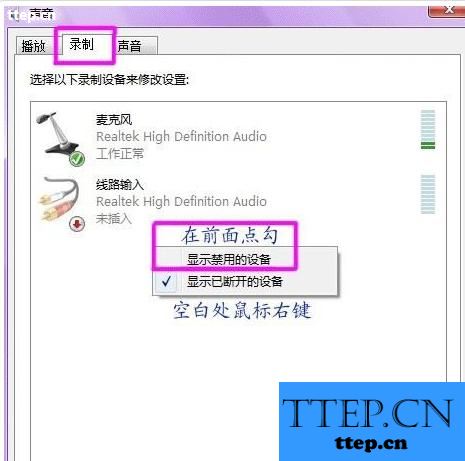
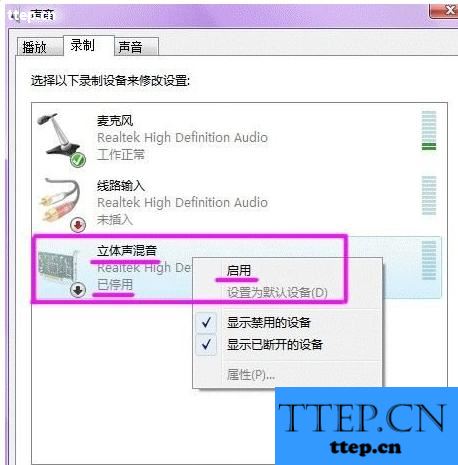
2、对录制选项进行修改,选择“录制”,在中间的空白处点鼠标右键,勾选“显示禁用的设备”--“立体声混音”-启用
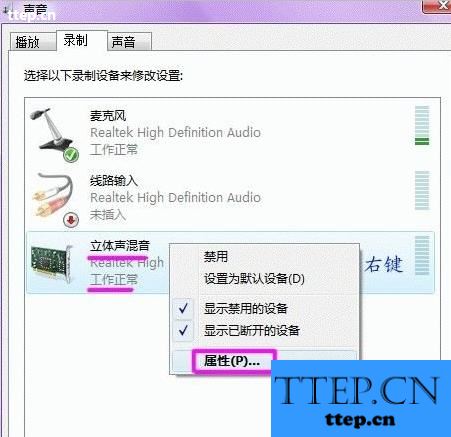
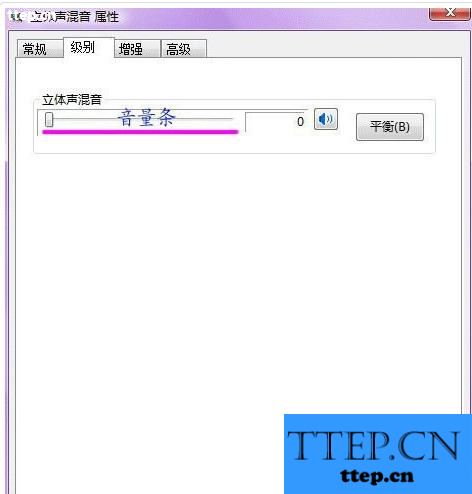
3、对混音选项进行调试,点击“立体声混音”,右键“属性”,或者是右下角的。出现“立体声混音”音量条,根据实际效果自行调节,点右下角的“确定”。再点到播放上,在扬声器上右键属性,点击级别,把里面的所有小红叉点消掉。
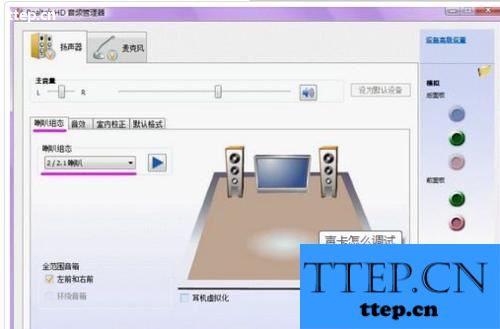
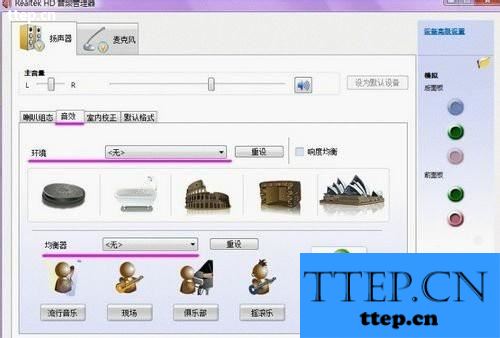
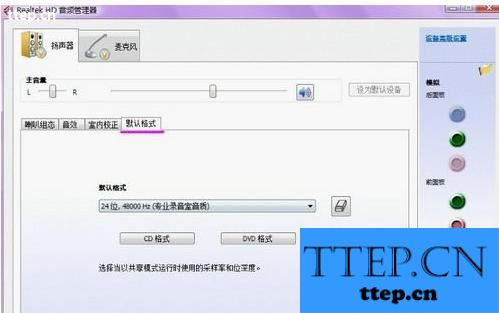
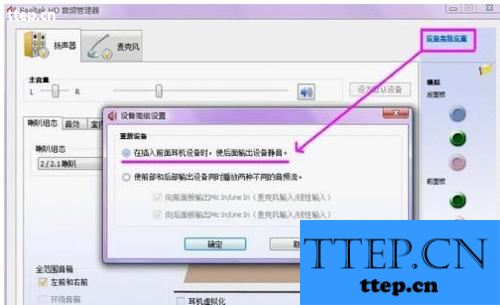
4、音频管理器设置,双击打开右下角的“红色小喇叭”;或者是:开始-设置-控制面板-高清声卡。扬声器“喇叭组态”设置。 在音效栏中继续设置 -“默认格式”设置--- 麦克风“麦克风效果”设置-“默认格式”设置-设备高级设置”。

5、确定后,VISTA系统下的声卡调试基本完成,如有其它方面需求,按自己的意愿进行操作修改。
声卡也叫音频卡,是多媒体技术中最基本的组成部分,是实现声波/数字信号相互转换的一种硬件。声卡的基本功能是把来自话筒、磁带、光盘的原始声音信号加以转换,输出到耳机、扬声器、扩音机、录音机等声响设备,或通过音乐设备数字接口使乐器发出美妙的声音。在不同系统下,调试的方式也不同,以Vista系统为例:
1、打开声音调节板,在右下角的小喇叭上点右键,选择“录音设备”。

2、对录制选项进行修改,选择“录制”,在中间的空白处点鼠标右键,勾选“显示禁用的设备”--“立体声混音”-启用


3、对混音选项进行调试,点击“立体声混音”,右键“属性”,或者是右下角的。出现“立体声混音”音量条,根据实际效果自行调节,点右下角的“确定”。再点到播放上,在扬声器上右键属性,点击级别,把里面的所有小红叉点消掉。


4、音频管理器设置,双击打开右下角的“红色小喇叭”;或者是:开始-设置-控制面板-高清声卡。扬声器“喇叭组态”设置。 在音效栏中继续设置 -“默认格式”设置--- 麦克风“麦克风效果”设置-“默认格式”设置-设备高级设置”。


5、确定后,VISTA系统下的声卡调试基本完成,如有其它方面需求,按自己的意愿进行操作修改。
- 最近发表
- 赞助商链接