主页 > 经验 >
Windows7系统缓存空间怎么设置 Windows7系统设置缓存空间的图文
Windows7系统缓存空间怎么设置 Windows7系统设置缓存空间的图文教程 在我们使用的Windows7系统中,有预留一定的系统缓存空间,这些空间的作用是帮助电脑能够更快的读取数据和写入数据,如果缓存空间不足将会导致系统运行变慢,如果碰到这种情况,该怎么进行缓存设置呢?对于这个问题,下面将给大家详细介绍缓存设置方法。
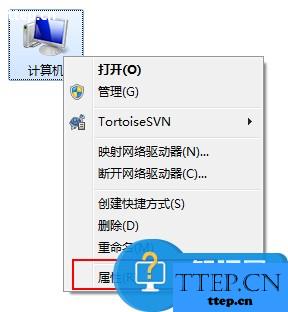
1、开启电脑,用鼠标选择桌面上的“计算机”然后单击鼠标右键,选择“属性”;
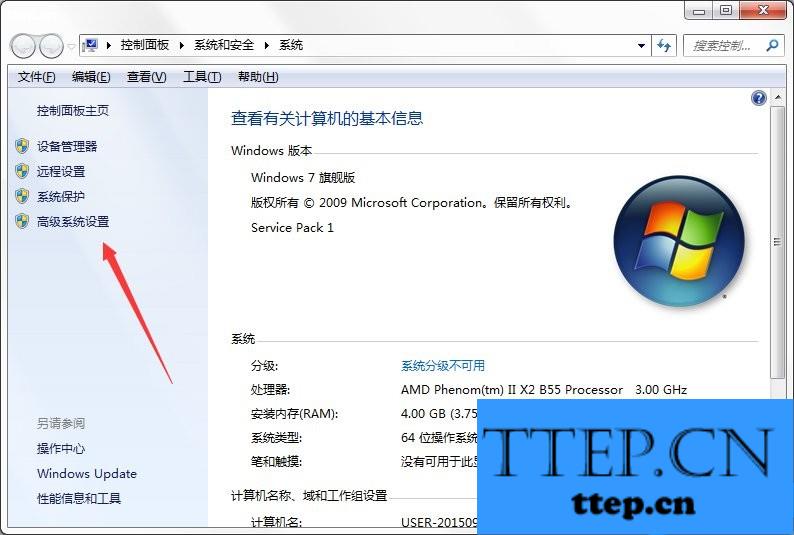
2、在窗口的左上方,选择“高级系统设置”;
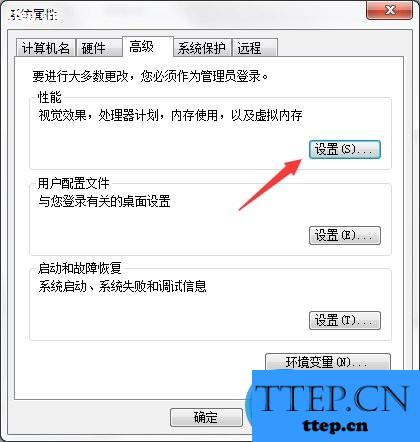
3、进入“系统属性”窗口,选择“高级”在性能设置处选择“设置”;
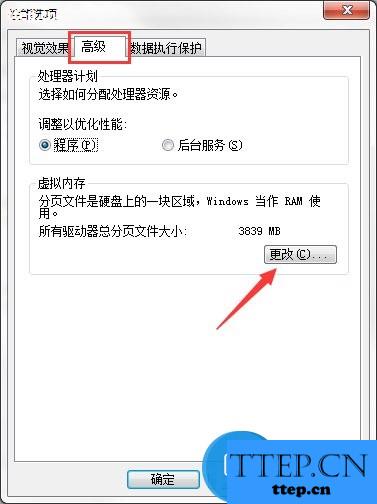
4、选择“高级”然后点击“更改”;
5、进入“虚拟内存”设置窗口,如您不懂如何设置,可以选择为“自动分配托管的方式”让系统自动设置;

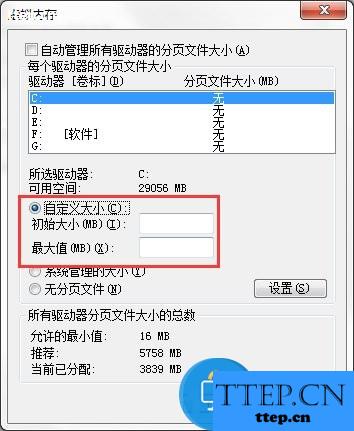
6、当然您也可以手动设置,只要取消自动分配选项即可手动设置;

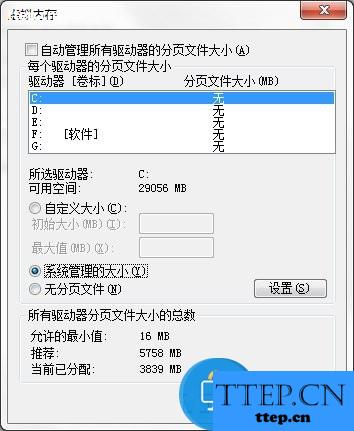
7、选择““自定义”然后输入您需要设置的虚拟空间大小即可,也可以选择“系统管理大小”;
8、设置完成后,单击“确定”然后重启电脑即可。
当电脑使用一段时间后,系统缓存空间会变小,不过只要进行下系统缓存清理就可以将里面的空间释放出来。每个系统会有默认的缓存空间,如果你觉得系统默认的空间不够大,就可以按照上面的方法来进行设置。
1、开启电脑,用鼠标选择桌面上的“计算机”然后单击鼠标右键,选择“属性”;

2、在窗口的左上方,选择“高级系统设置”;

3、进入“系统属性”窗口,选择“高级”在性能设置处选择“设置”;

4、选择“高级”然后点击“更改”;

5、进入“虚拟内存”设置窗口,如您不懂如何设置,可以选择为“自动分配托管的方式”让系统自动设置;

6、当然您也可以手动设置,只要取消自动分配选项即可手动设置;

7、选择““自定义”然后输入您需要设置的虚拟空间大小即可,也可以选择“系统管理大小”;


8、设置完成后,单击“确定”然后重启电脑即可。
当电脑使用一段时间后,系统缓存空间会变小,不过只要进行下系统缓存清理就可以将里面的空间释放出来。每个系统会有默认的缓存空间,如果你觉得系统默认的空间不够大,就可以按照上面的方法来进行设置。
- 上一篇:cpu使用率高的解决办法
- 下一篇:Windows自带记事本实用小技巧
- 最近发表
- 赞助商链接