主页 > 经验 >
电脑装MySQL免安装版配置失败提示系统错误2怎么解决?
近来有用户在电脑中安装MySQL服务的时候,发现无法启动并提示系统错误2,系统找不到指定的文件。不知道怎么回事?因此,接下来小编和大家介绍一下电脑装MySQL免安装版配置失败提示系统错误2解决方法
有些用户可能会到网上下载免安装的绿色版软件,不需要安装过程,可以随意拷贝,便于携带,也很容易删除。但有用户在电脑中出现mysql免安装版配置失败并提示系统错误2的问题。接下来小编要介绍一下具体的配置方法和相关错误的解决方法。
1,右击选择解压文件;
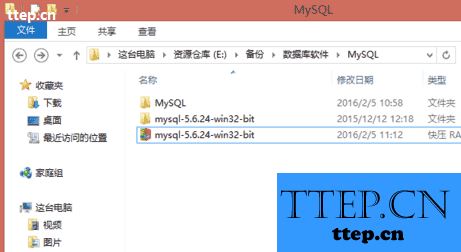
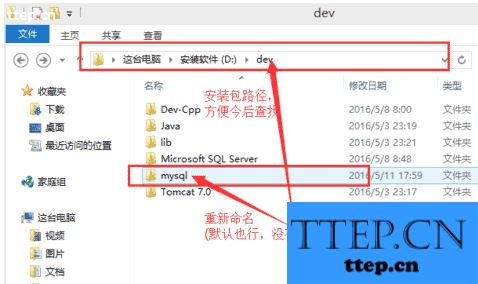
2、解压后的文件一般会防止常用的软件安装路径中;
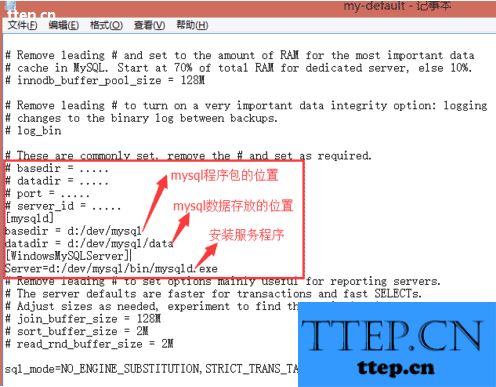
3、找到my-default.ini文件,并进行编辑并保存:
# basedir = .....
# datadir = .....
找到这两行,复制到[mysqld]的下一行,然后去掉签名的#并修改后面的路径,如:
basedir = d:/dev/mysql (免安装包的位置,要根据具体情况填写)
datadir = d:/dev/mysql/data (数据库文件的位置)
然后在下一行加上以下内容:
[WindowsMySQLServer]
Server=d:/dev/mysql/bin/mysqld.exe
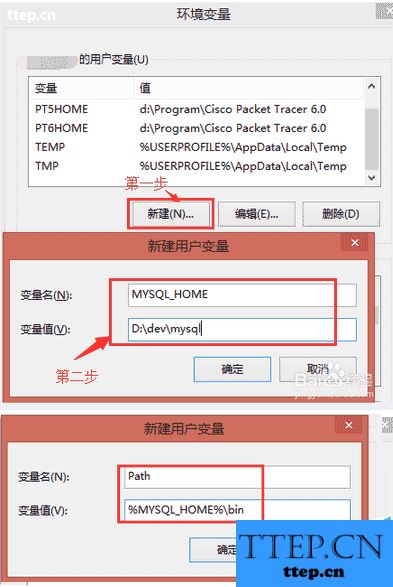
4、配置系统环境:打开环境变量设置,在用户变量(系统变量)新建MYSQL_HOME变量,值为d:\dev\mysql
在用户环境变量(系统变量)新建Path变量,组、值为%MYSQL_HOME%\bin即可;
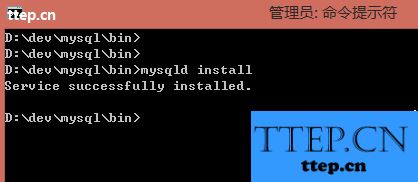
5、注册服务:以管理员身份运行命令提示符,进入mysql的bin目录下,输入:mysqld install并回车;
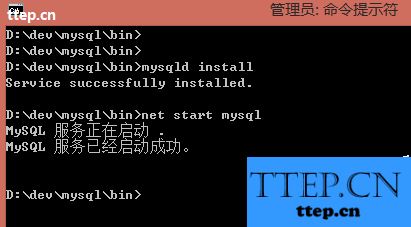
6、启动服务:输入net start mysql并回车;
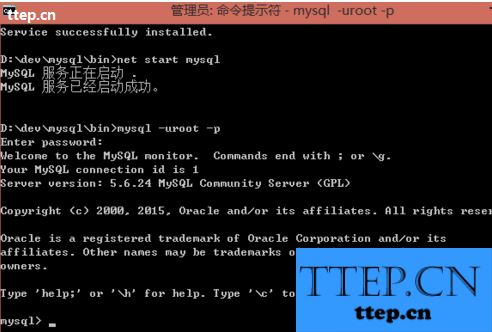
7、然后就可以登录mysql;
8、如果提示发生系统错误2,系统找不到指定的文件怎么办;

9、可以再次执行命令mysqld install,可以发现提示“The current server installed: "C:\Program Files\MySQL\MySQL Server 5.6\mysqld",而真正的mysqld.exe路径是在d:\dev\mysql\bin\mysqld.exe;
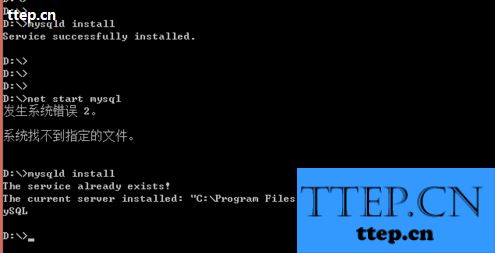
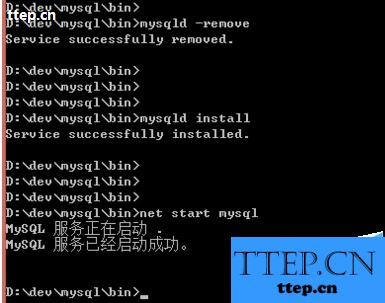
10、即使正确配置了环境变量,启动mysqld时应该转到mysql/bin目录下去执行:
先移除上次安装错误的服务:mysqld -remove,然后再启动服务:
mysqld install
net start mysql
上述和大家介绍的就是电脑中mysql免安装版的具体配置方法和提示系统错误2的的解决方法。感兴趣的用户欢迎关注TTEP!
有些用户可能会到网上下载免安装的绿色版软件,不需要安装过程,可以随意拷贝,便于携带,也很容易删除。但有用户在电脑中出现mysql免安装版配置失败并提示系统错误2的问题。接下来小编要介绍一下具体的配置方法和相关错误的解决方法。
1,右击选择解压文件;

2、解压后的文件一般会防止常用的软件安装路径中;

3、找到my-default.ini文件,并进行编辑并保存:
# basedir = .....
# datadir = .....
找到这两行,复制到[mysqld]的下一行,然后去掉签名的#并修改后面的路径,如:
basedir = d:/dev/mysql (免安装包的位置,要根据具体情况填写)
datadir = d:/dev/mysql/data (数据库文件的位置)
然后在下一行加上以下内容:
[WindowsMySQLServer]
Server=d:/dev/mysql/bin/mysqld.exe

4、配置系统环境:打开环境变量设置,在用户变量(系统变量)新建MYSQL_HOME变量,值为d:\dev\mysql
在用户环境变量(系统变量)新建Path变量,组、值为%MYSQL_HOME%\bin即可;

5、注册服务:以管理员身份运行命令提示符,进入mysql的bin目录下,输入:mysqld install并回车;

6、启动服务:输入net start mysql并回车;

7、然后就可以登录mysql;

8、如果提示发生系统错误2,系统找不到指定的文件怎么办;

9、可以再次执行命令mysqld install,可以发现提示“The current server installed: "C:\Program Files\MySQL\MySQL Server 5.6\mysqld",而真正的mysqld.exe路径是在d:\dev\mysql\bin\mysqld.exe;

10、即使正确配置了环境变量,启动mysqld时应该转到mysql/bin目录下去执行:
先移除上次安装错误的服务:mysqld -remove,然后再启动服务:
mysqld install
net start mysql

上述和大家介绍的就是电脑中mysql免安装版的具体配置方法和提示系统错误2的的解决方法。感兴趣的用户欢迎关注TTEP!
- 最近发表
- 赞助商链接